
With over 2.14 billion people expected to shop online in 2021, now could be the ideal time to launch an e-commerce website. However, starting your own digital empire can be a daunting task.
Fortunately, robust and feature-rich e-commerce platforms such as WooCommerce make it easier than ever to create online stores. By opting for WooCommerce, you’ll have access to everything you need to start selling products and services to a global audience.
In this full WooCommerce guide, we’ll explore why online shopping is at an all-time high. We’ll then show you how to launch your WooCommerce-powered website. Let’s get started!
Why you might want to start an e-commerce website
The Internet has completely revolutionized the way we shop. Over the past few years, we’ve seen increasingly more people switch to ordering products and services online:
However, the COVID-19 pandemic has supercharged this shift to e-commerce. The pandemic forced many physical brick-and-mortar stores to close their doors. Unsurprisingly, we saw online shopping reach an all-time high.
This trend shows no signs of slowing down. Global e-retail revenue is projected to reach $5.4 trillion in 2022. If you’ve always wanted to launch your own e-commerce store, then you currently have the potential to connect with a large and growing audience.
We’re not going to pretend that starting any new business is easy. However, opening an e-commerce store can avoid many overheads associated with running physical shops. These expenses include renting or purchasing your retail unit, plus ongoing payments such as heating and lighting bills.
Online stores can also remain open for business around the clock without paying staff premiums for working unsociable hours. With this in mind, e-commerce is a golden opportunity to maximize your customer base and sales while minimizing your running costs.
Learn how to start an e-commerce website (your full WooCommerce guide)
There are many plugins you can use to create online stores. However, WooCommerce is a hugely popular platform that powers 28 percent of the top one million e-commerce sites.
The core software is also supported by a vast community of third-party themes and WooCommerce Extensions. These features give you the flexibility to create exactly the kind of online store that’ll appeal to your target audience. Let’s see how you can start your new e-commerce venture in six easy steps.
Step 1: Purchase a domain name
The domain name is the address shoppers will type into their web browsers when visiting your e-commerce store. Choosing a domain name is one of the most important decisions you can make.
The ideal URL should reflect your business, target audience, or products. Get this decision right, and your domain can help strengthen your branding.
While it is possible to change your website’s URL later, this can confuse your customers and dilute your branding. It can also harm your Search Engine Optimization (SEO) rankings. Over 40 percent of revenue for most stores comes from organic traffic. As such, anything that damages your SEO is also a significant threat to your bottom line.
If you already have a URL in mind, you can check whether this domain is available using Name.com. This service will display multiple domains that match your search criteria:
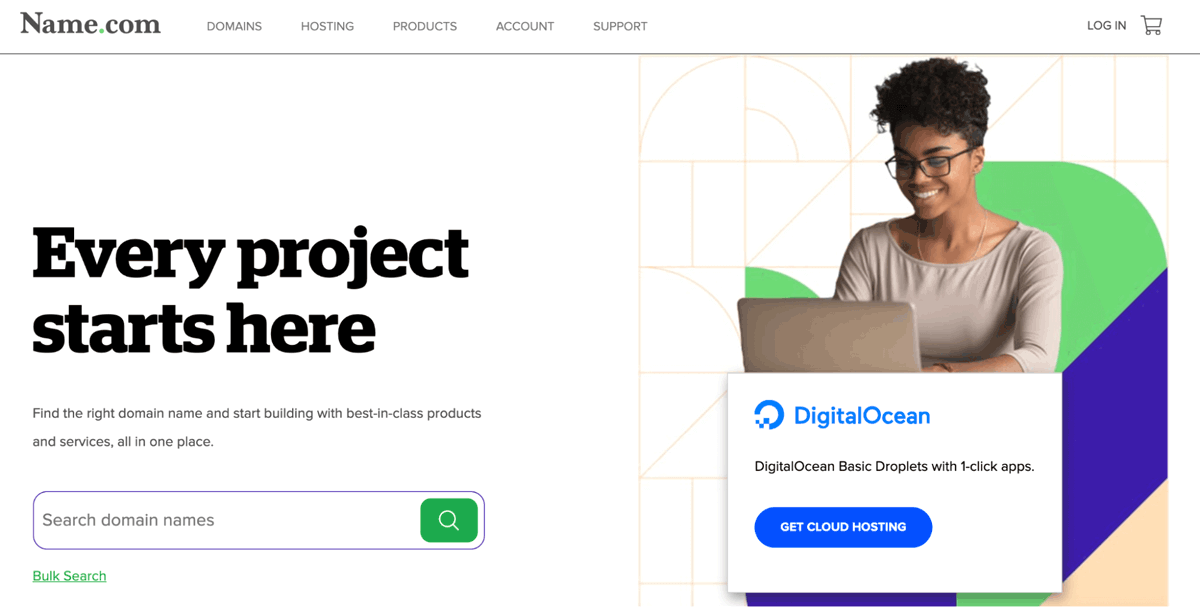
If you haven’t already chosen a domain name, you can experiment by entering a few relevant keywords into Name.com. Doing so may be enough to fire up your imagination. The platform can also indicate the prices you can expect to pay for a quality domain name.
Step 2: Purchase web hosting
Every e-commerce site is hosted on a web server. While you could purchase and maintain your own server, most online store owners pay a third party for web hosting.
Choosing the right hosting provider is important for any website owner. However, in e-commerce, any downtime can have an immediate impact on your sales.
For this reason, it’s wise to examine the provider’s uptime rates. It can reduce your chances of missing out on sales due to unscheduled downtime.
Performance is another factor to take into consideration. Evidence suggests that 40 percent of people abandon a site that takes longer than three seconds to load. If your e-commerce site makes $100,000 per day, then a one-second delay could cost you $2.5 million in lost sales every year.
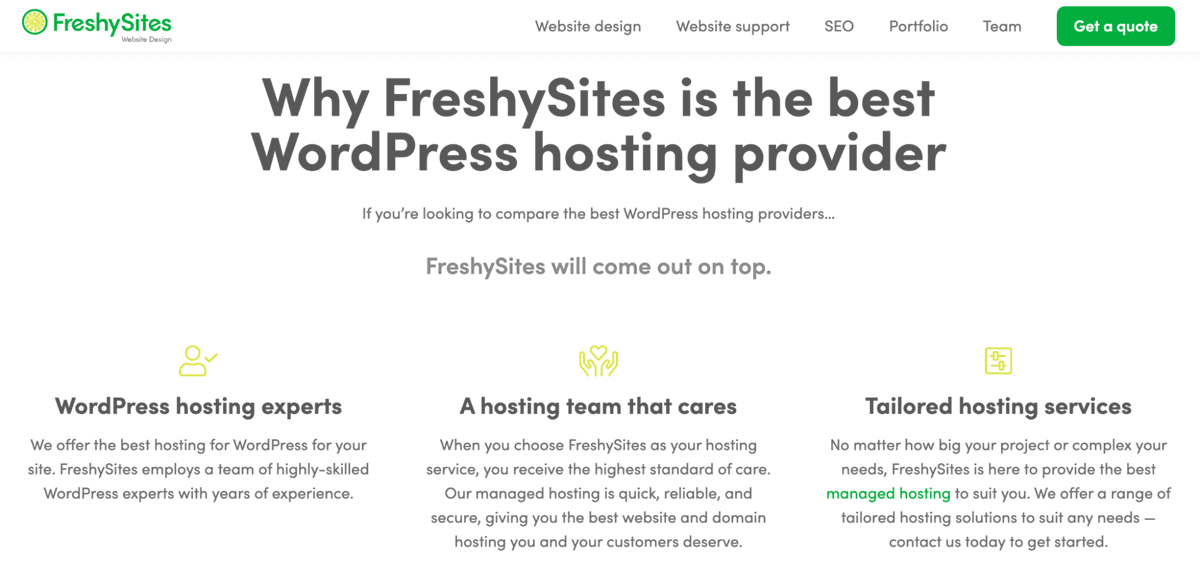
If you’re going to convert visitors into paying customers, it’s vital to choose a host that delivers high performance. At Freshy, we use the best servers to provide fast page loading speeds to all of our customers:
Page loading speeds can also affect where your store appears in the search engine results. Google has used page speed as a ranking factor for years. It also recently announced its taking page experience signals into consideration.
As previously mentioned, SEO can have a direct impact on your sales. By opting for a provider such as Freshy, you can be confident that your site’s performance is earning you extra sales rather than scaring away potential customers.
Online store owners typically handle a large amount of sensitive data, including payment information. This makes you a prime target for hackers.
With this in mind, we also recommend finding a provider that follows all the WordPress security best practices. For example, our Freshy hosting packages include privacy protection and Secure Sockets Layer (SSL) certificates.
Step 3: Configure your store
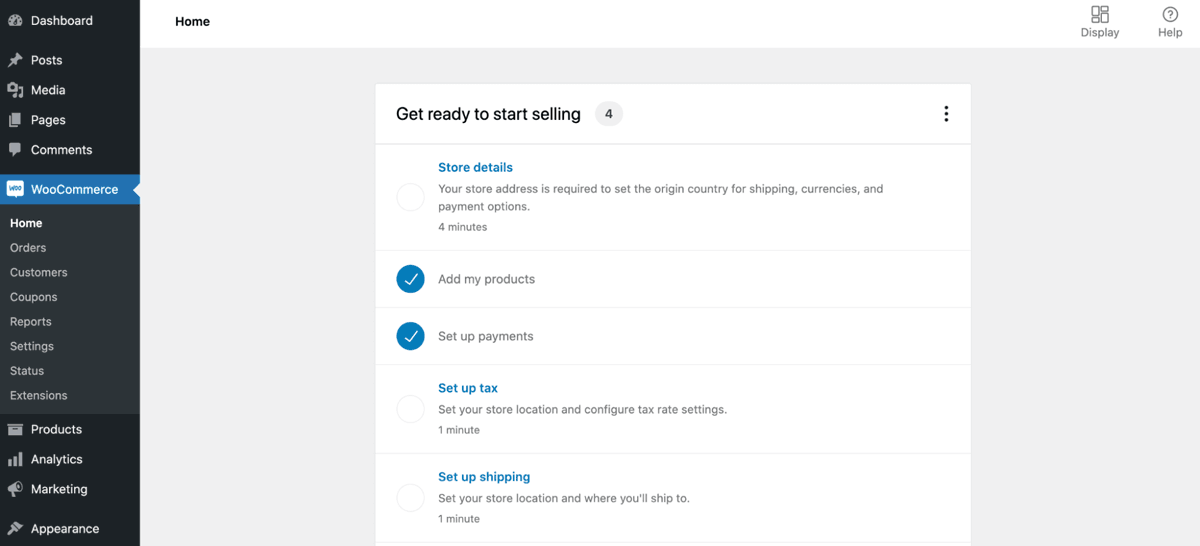
The first step is installing and activating the WooCommerce plugin. Once you’re up and running with this popular e-commerce platform, select WooCommerce from the left-hand menu in your WordPress dashboard. It will display your To-Do list:
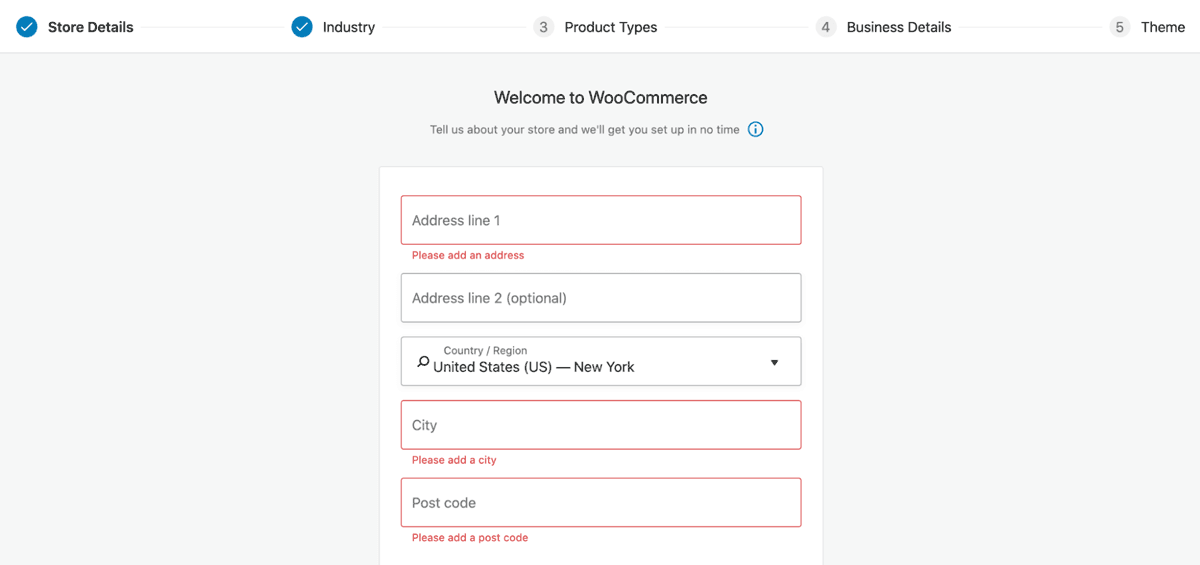
Let’s start from the top by selecting Store Details. When prompted, enter your store address. This will help WooCommerce configure your currency options and shipping rules:
On the next screen, choose an industry and the type of products that you plan to sell. For example, you might have a warehouse full of physical items. Alternatively, perhaps you specialize in digital offerings such as bookings, subscriptions, or memberships:

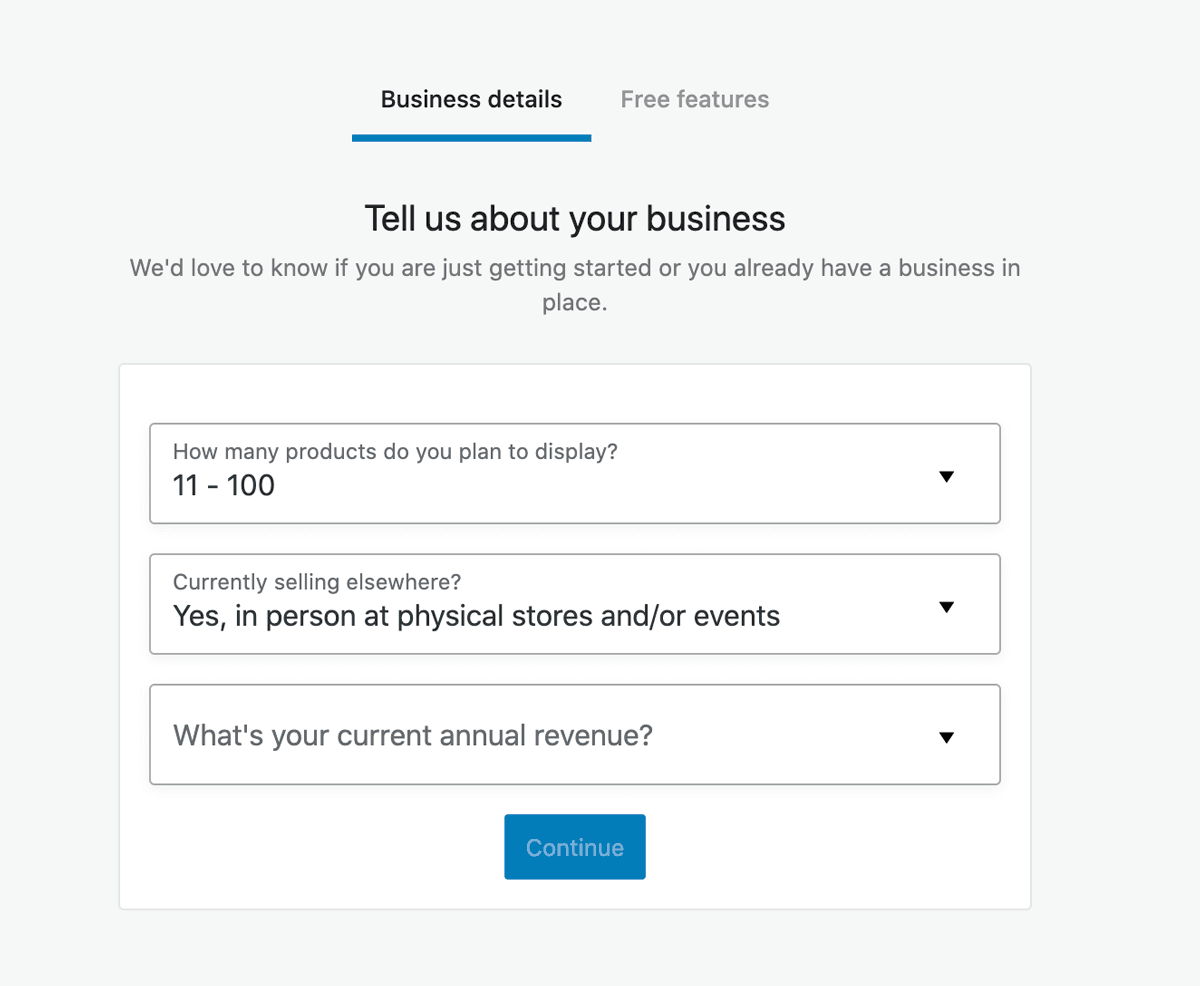
WooCommerce will now ask how many products you have to display and whether you currently sell elsewhere. For example, you might already run a physical brick-and-mortar store:
Based on the information you’ve entered, WooCommerce will recommend some features, services, and add-ons that you may want to use on your site. They can help get your store off to the best possible start, so it’s well worth exploring these recommendations.
Step 4: Choose your WooCommerce theme
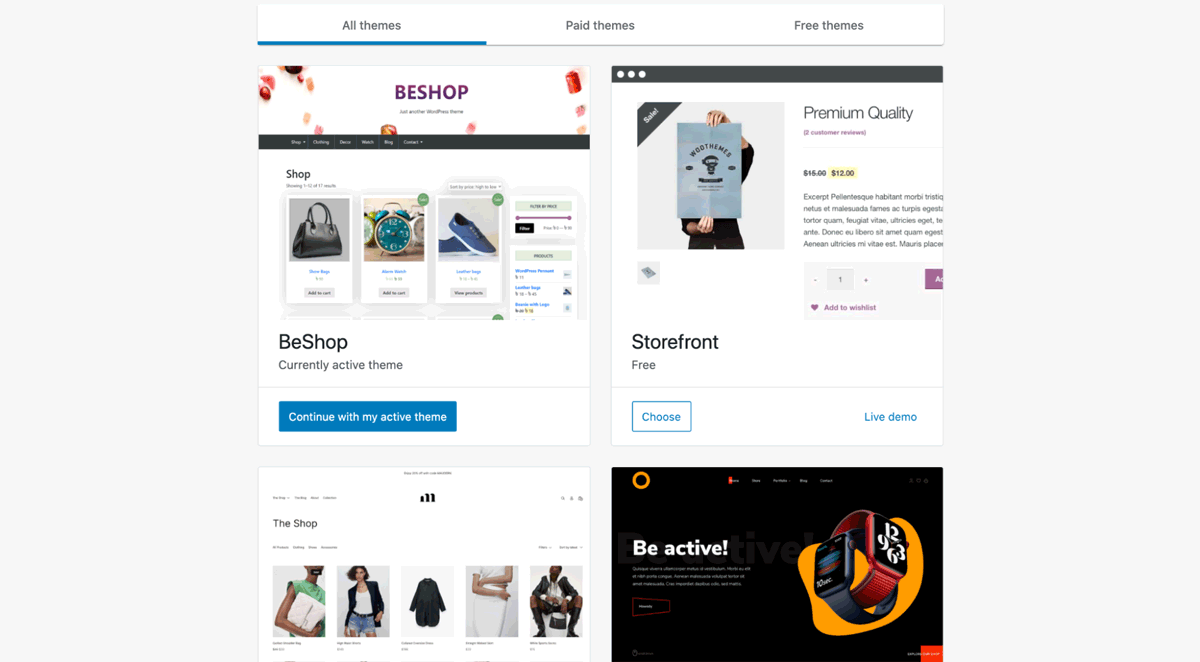
Next, you’ll be prompted to choose your WooCommerce theme. Out-of-the-box, this plugin offers a selection of free and premium e-commerce options:
Ideally, you should choose a theme that’s easy to use and has exactly the features you need. Here, you should bear in mind that there’s such a thing as too many features.
Theme bloat can affect your store’s performance, which will impact your SEO and your sales. With this in mind, the ideal option will tick every item on your wishlist – and provide very few unnecessary added extras.
In 2021, around 72 percent of all e-commerce sales are expected to happen via mobile devices. As such, it’s vital to choose a responsive theme.
While it’s true that most modern WooCommerce themes are designed with mobile devices in mind, they still may not function perfectly across all smartphones and tablets. Even if your chosen theme is explicitly labeled as mobile-responsive, it’s still smart to manually test it on your device.
Since SEO has a significant impact on your sales, choosing a theme that helps you climb those search engine rankings is crucial. If it boasts straightforward navigation and search features, then you’re off to a great start.
Many modern themes also have built-in SEO features, such as customizable meta descriptions and titles. These settings can be invaluable for fine-tuning your search engine performance strategy.
There’s a lot to consider when choosing a theme. Fortunately, the WooCommerce site builder lets you preview each theme, helping you make the right decision. Once you’ve settled on an option, WooCommerce will go ahead and build your e-commerce store.
Step 5: Create a shipping zone and method
Many online stores sell digital products such as videos, webinars, and ebooks. However, if you specialize in physical items, you’ll need to configure your store’s shipping options.
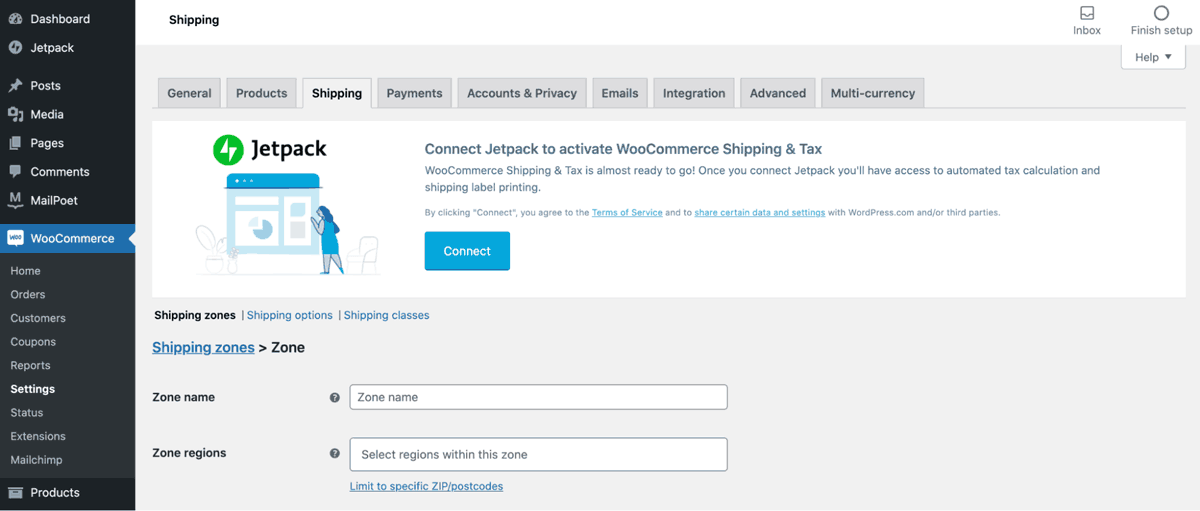
You’ll need to create at least one shipping zone, a geographical area where you’re sending the purchased item. To add one, navigate to WooCommerce > Settings > Shipping > Add Shipping Zone:
You can now give this zone a name and specify the regions you include in it. Next, select Add Shipping Methods. It displays a popup where you can choose the shipping methods for people located within the specified area:

According to a recent survey, almost half of consumers prefer stores that offer free shipping. In addition, 77 percent identify free shipping as the most important factor when making purchasing decisions.
Shoppers love free shipping, so you may want to consider offering this option wherever possible. Local pickup is also popular amongst customers. It provides all the convenience of online purchasing without the added delivery costs.
It’s worth noting that you can add multiple shipping methods to the same zone. With these options, shoppers can choose the most convenient delivery methods for them.
Step 6: Add your products
At this point, you have an online store, but you don’t have anything to sell. It’s time to stock those shelves!
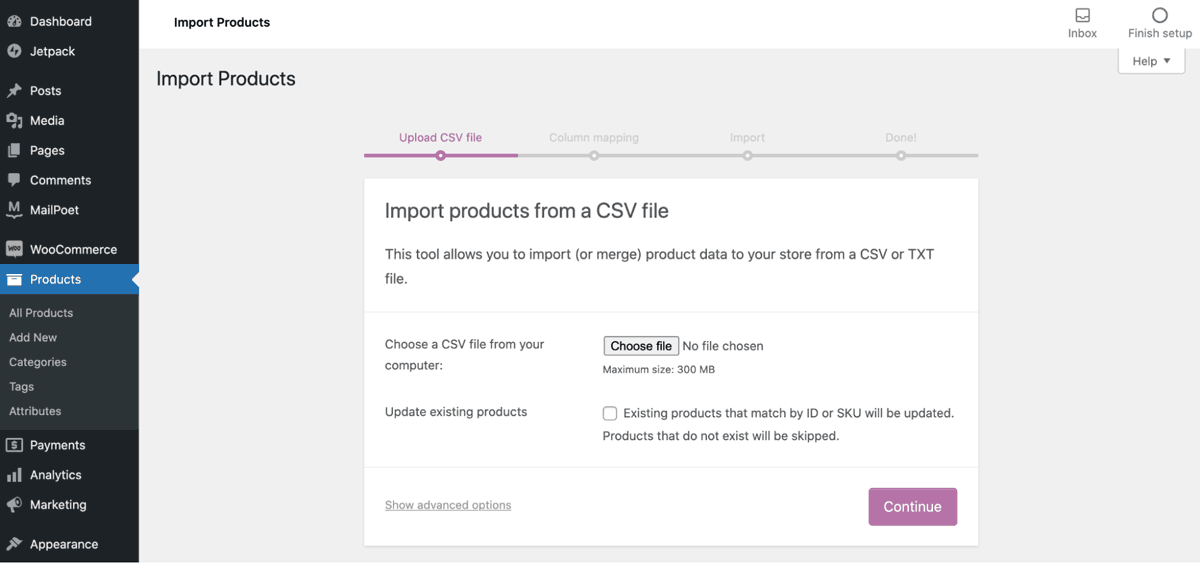
If you’re migrating from another e-commerce platform, then WooCommerce has a built-in product Comma-Separated Values (CSV) importer. You can use this tool to upload hundreds or even thousands of products in a single CSV file. It can save you a considerable amount of time and effort.
If you have a CSV file containing all your product information, navigate to Products > Import. You can now upload your file:
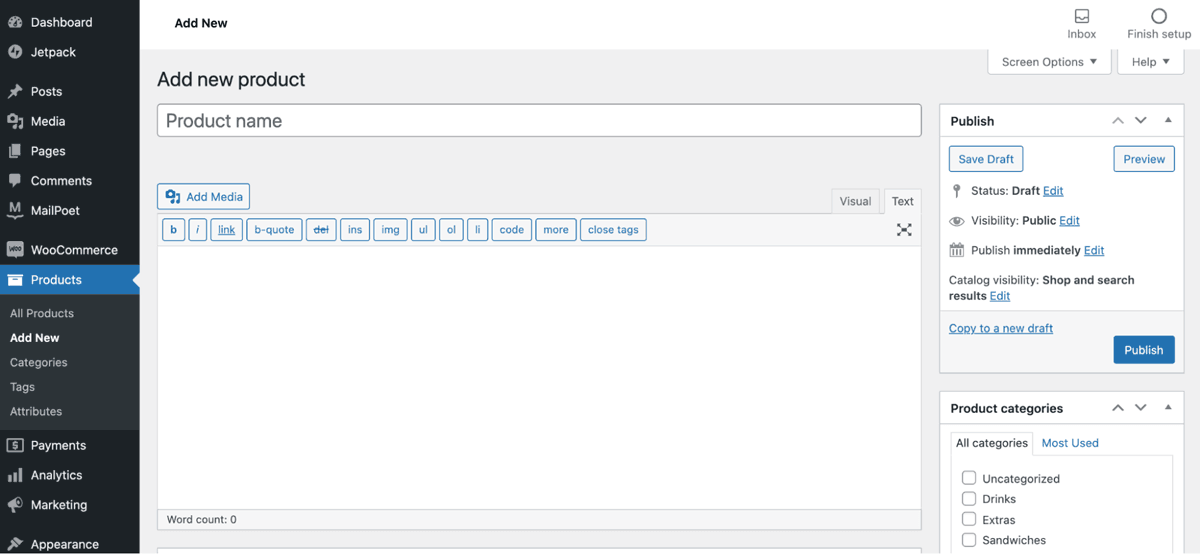
If you don’t have a CSV file, then you can create each product listing manually. To start, navigate to Products > Add New. You can now give your item a descriptive title:
Next, open the Product data dropdown and specify the kind of item that you want to create. For example, you might be selling a Variable Product:

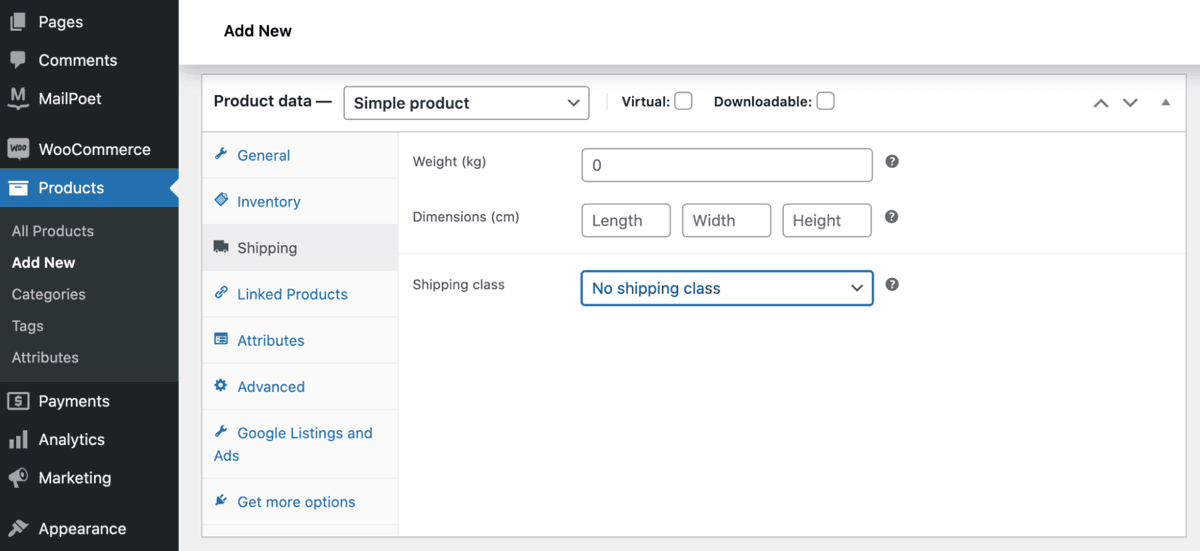
Assign this item to a product category, upload at least one eye-catching and compelling product image, and set your price. After entering all of this information, select Shipping and specify the shipment options that you want to offer for this particular product:
There are more options to explore, but this is all you need to create a basic product. Simply repeat this process until your WooCommerce store is fully stocked and ready for business.
Conclusion
We’re not going to pretend that starting an e-commerce business is easy. However, with more people shopping online than ever before, this is your chance to connect with a huge (and growing) audience.
You can follow these steps to start an e-commerce website with WooCommerce:
- Purchase a domain name.
- Buy web hosting.
- Configure your store.
- Choose your WooCommerce theme.
- Create a shipping zone and method.
- Add your products.
Get these steps right, and you’ll have a rock-solid foundation for your WooCommerce-powered store.


)