
With over 28 million live websites currently running on WordPress, it’s safe to say that this platform is one of the most popular Content Management Systems (CMSs). WordPress has built this robust audience thanks to its powerful yet user-friendly features. However, if making a WordPress website still seems like an intimidating task, you’re not alone.
Fortunately, there’s no need to go into the process completely blind. Most WordPress websites share a basic structure that can help you build your own. By understanding these essential components along with learning how to use the Divi builder, you can confidently create a full-featured site.
In this article, we’ll introduce the Divi builder and cover a few reasons why you might want to use it. Then, we’ll walk you through five steps to building your new WordPress website. Let’s get started!
An introduction to the Divi builder
When it comes to WordPress, there’s a huge variety of potential tools to improve your site-building experience. However, we believe one stands out among the rest: the Divi builder.
This plugin utilizes a visual builder interface to harness its impressive power:
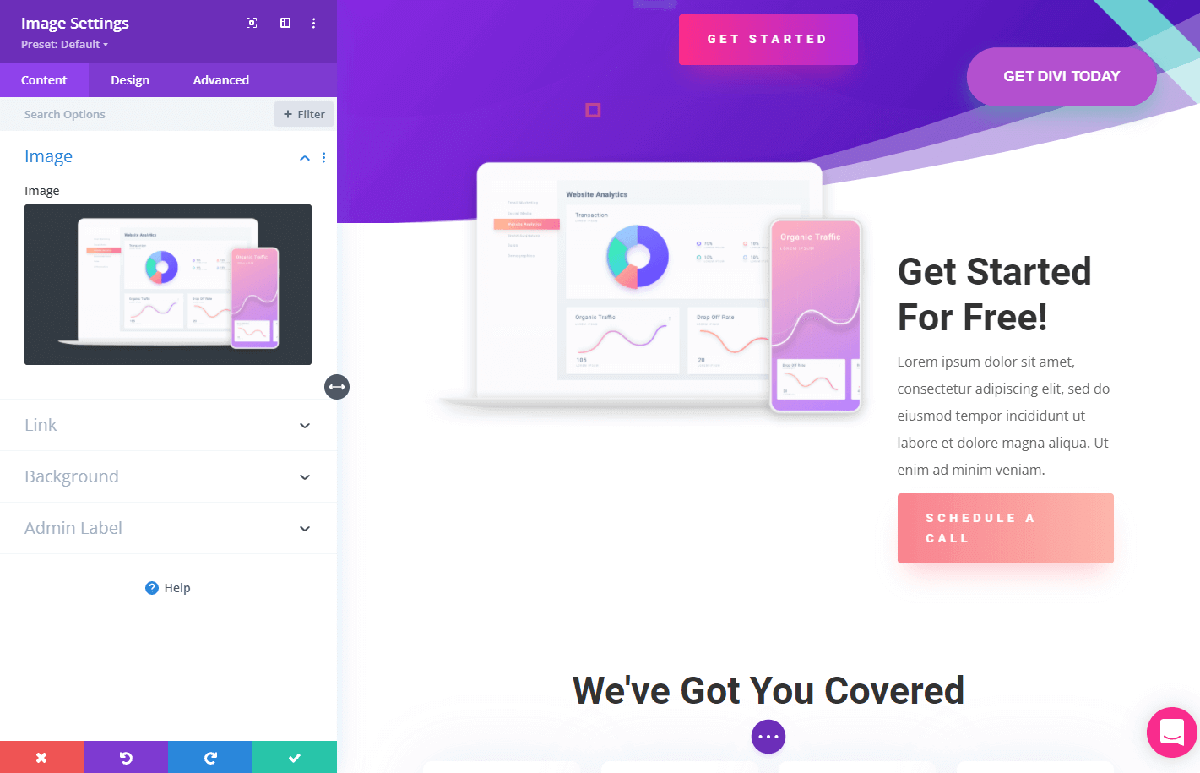
There’s no need to type lines of code or struggle with complicated internal settings. All you have to do is click on the element you want to edit and interact with the user-friendly menu. Even WordPress pros can use Divi for a more efficient building process.
However, ease of use isn’t the only benefit. Divi also offers a huge library of website templates. You can customize these pre-built sample websites as much as you want. This means you can work less on the basic structure and more on your unique branding.
Finally, the Divi builder doesn’t have to be a stand-alone resource. This tool comes with the Divi theme; a lightweight program that’s been designed with the page-building process in mind. This can be a huge advantage if you value performance.
Nevertheless, the Divi builder is a high-quality plugin that will work with most themes. As such, you don’t have to worry about being limited creatively. You’re free to choose the design that best fits your needs.
With all of these impressive elements, it probably won’t come as a surprise that Divi is a premium product. If you’re not sure about investing, we encourage you to experiment with the demo site and get a feel for what it has to offer.
How to design a WordPress website in 5 steps (using Divi)
In this section, we’ll walk you through how to make a WordPress website in just a few steps. Before you begin, make sure that you’ve fully installed WordPress.
Step 1: Install and activate Divi
Divi will play a pretty pivotal role in this walkthrough, so let’s start by getting it set up. If you head over to the pricing page, you’ll see that you have two plans to choose from: a year’s worth of access for $89 or lifetime access for $249.
Either plan will work for this walkthrough. If you’re still on the fence about Divi, you’ll be pleased to know that both plans offer a 30-day no-questions-asked refund if you’re not satisfied.
After you make your purchase, you’ll also get access to the Divi theme. Feel free to download it for later, or if you want to choose a different theme, skip it entirely. Then, install and activate the page builder.
Once that’s done, you’ll need to enter your username and API key for full functionality. These are also required for essential updates, so we recommend that you take the time to add them now.
You can find your unique username and API key in the Elegant Themes members area. Then, go to your WordPress dashboard and navigate to Divi > Theme Options > Updates:

Enter your information and click Save Changes. Your builder should now be ready to go. If you want to get a feel for the interface before moving on, create a new page on your WordPress backend and click on Enable Visual Editor in the toolbar.
This will launch the visual builder. From there, you can explore a few of your design options. If you’d prefer a more structured approach to Divi, you can continue on through the rest of this walkthrough.
Step 2: Select a theme
Next up, it’s time to select your theme. A theme determines the look of your site. That includes everything from the basic layout structure to the color scheme. It’s also a prominent part of your site’s first impression, making it an essential aspect of your branding.
If you’ve opted to stick with the built-in Divi theme, you can skip this step. However, if you’re keeping your options open, there are a few things that you might want to keep an eye out for during your search.
One major consideration is how the theme looks out of the box. Divi may help you customize pages, but this process can take a lot of time. Thus, a design that’s already in line with your branding may be an efficient choice.
On the other hand, you may also want to check how easy a theme is to edit. We’re not saying you have to build a custom theme, but some parts will inevitably need a bit of tweaking. Finding one that makes the process smooth can prevent headaches later.
Another trait to look for is quality. This is an obvious yet essential part of the process – you don’t want to build a WordPress website that ends up breaking in a few weeks. An easy way to assess a theme is through reviews, ratings, and updates:
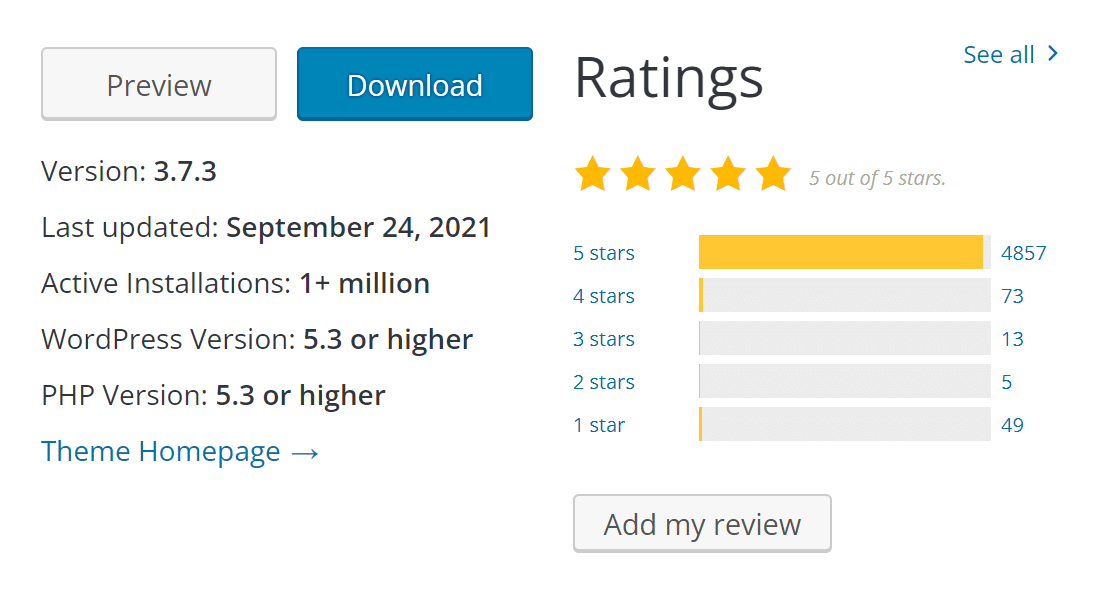
Try to look for options that have plenty of active installations and positive reviews. We also recommend that you prioritize themes that have been updated within the last six months. That’s usually a sign that you’ll keep getting security patches and other necessary maintenance from the developers.
Don’t be afraid to try on a few different themes before you start. Once you’re happy with your choice, move on to step three.
Step 3: Create your essential pages
When it comes to running a WordPress website, there are two factors that can play a big part in your success: your visitor’s first impression and their opportunities to connect. These can be accomplished by a homepage and an about page respectively.
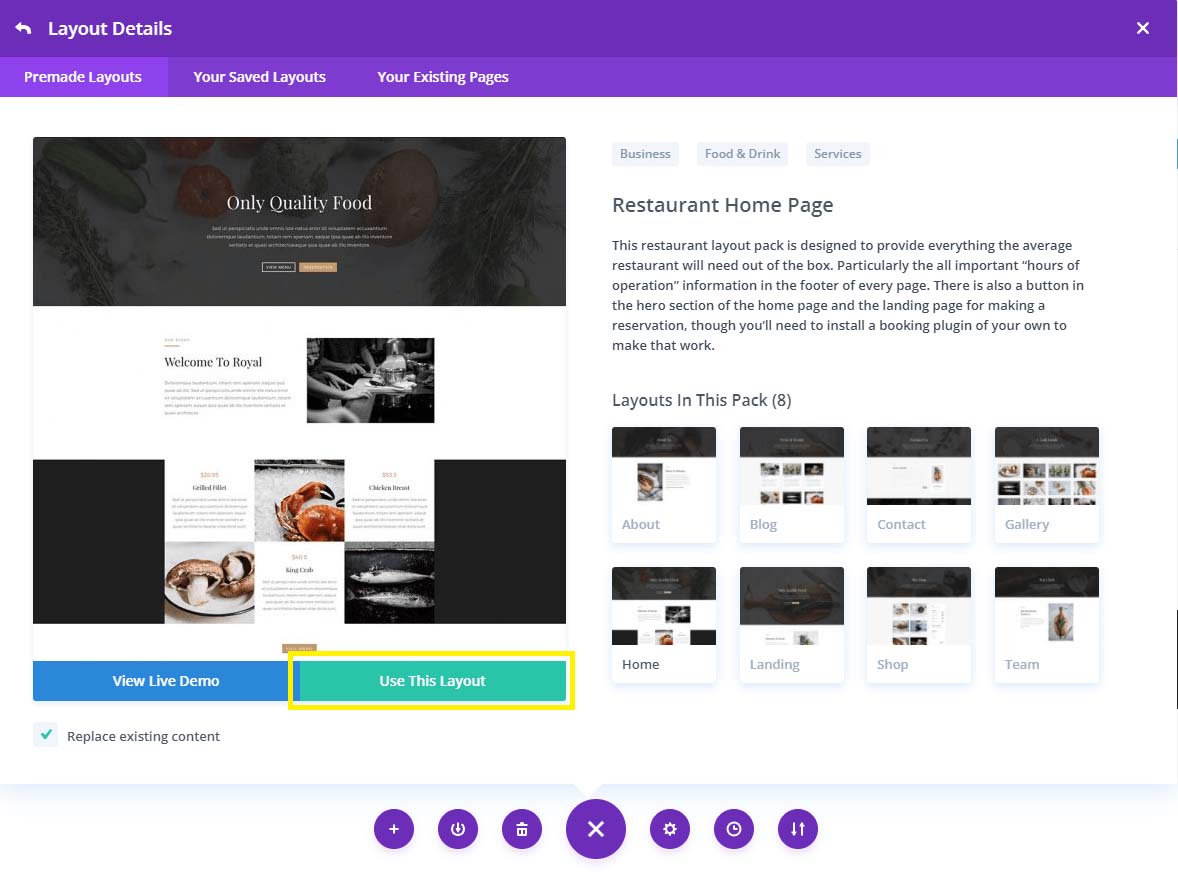
Let’s start with the homepage. After you’ve created a new page in WordPress, Divi will provide you with a few different options to get started. We’ll be using the template library, so click on Choose a premade layout:
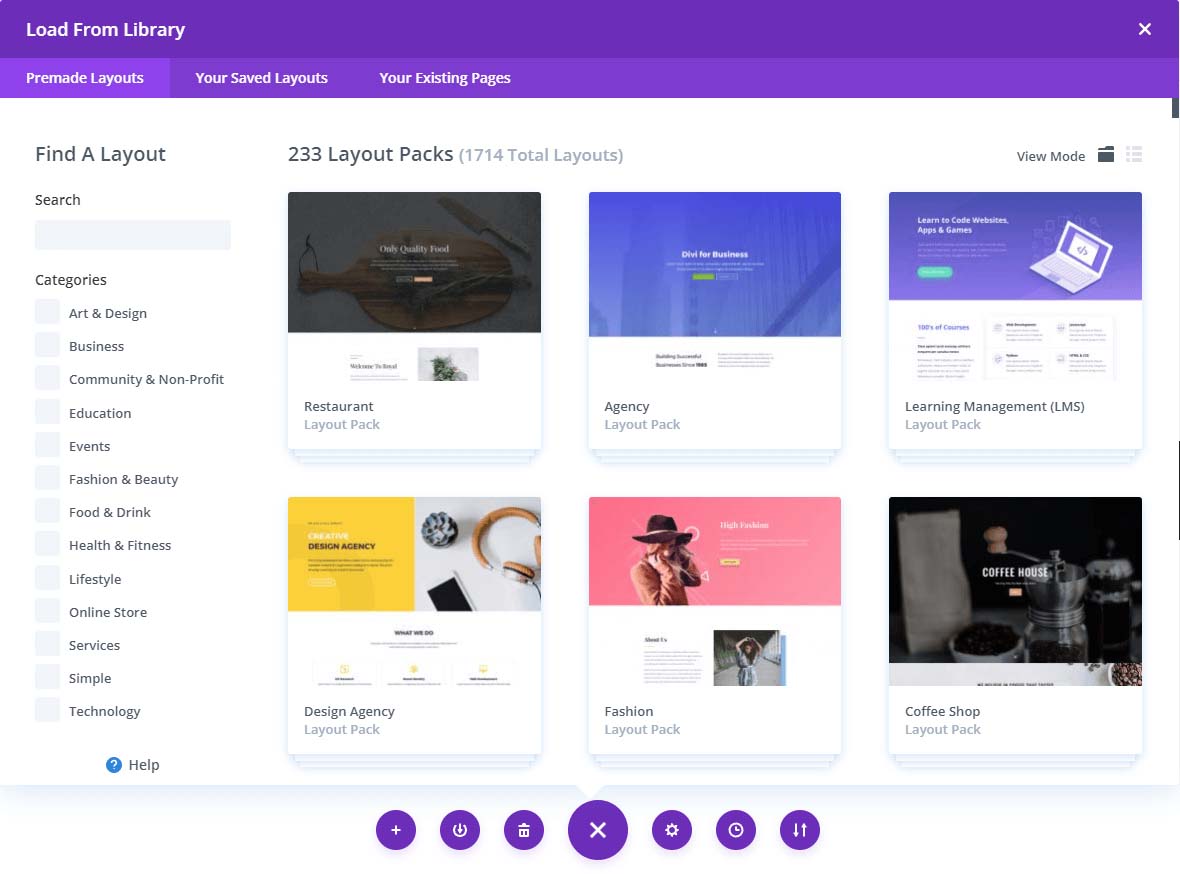
Then, click on the pack you want to use. We went with the restaurant design. From there, click on Home followed by Use this layout:
This will launch the Divi builder on your homepage template:

From here, you can start designing your WordPress website. You can click on any individual area to edit the text or design. You can also add or delete sections as necessary.
Your homepage is more or less an introduction to your brand. Thus, there are a few things you may want to consider doing for your homepage while you’re customizing this template:
- Make your brand name and site description as prominent as possible
- Add an easy-to-find menu that provides access to all of your pages
- Keep text areas concise and avoid any walls of text
After that’s done, repeat the earlier template steps for an about page:
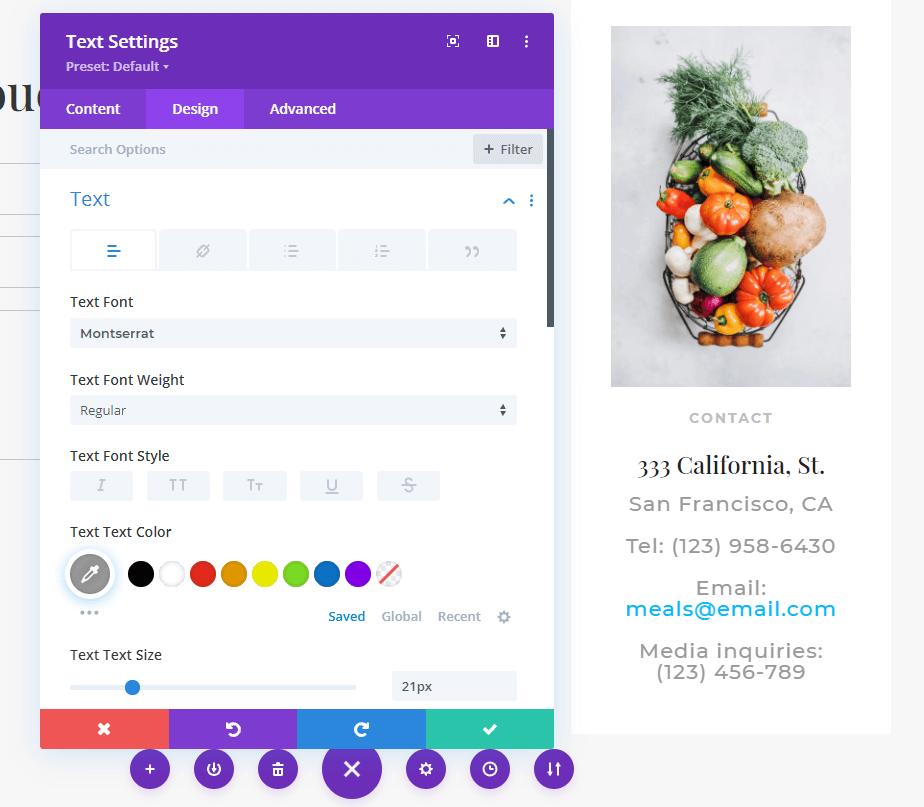
Then, consider the following advice as you start adjusting it for your website:
- Include as many contact options as possible
- Keep your site’s branding consistent with a brief description and fitting images
- Try increasing the font size for maximum visibility
These are two of the most basic pages. However, you don’t have to stop there! Consider adding other WordPress staples like a landing page or a photo gallery.
Step 4: Add unique pages
Let’s move on to less standard pages. These are those that not every website necessarily needs, but may be helpful depending on your goals. We’ll look at two specific ones: a blog and a store.
We’ll be using templates for this step, too. You can either stay in the same pack as you started with or mix it up. Once you’ve chosen an option from the library, you’ll see something similar to this:

The Blog Settings are probably the most important part of this page. Make sure you specify which post types and categories you want to include. You may also want to specify how many will show up on a page at a time.
We also recommend adding excerpts. This gives your audience a better idea of your content. However, you may want to keep these concise to prevent a huge wall of text.
Next, let’s take a look at a products page. This is going to be essential if you’re trying to launch an online store. Choose your template and move on to the editing screen. We’ll be focusing on the settings once again:
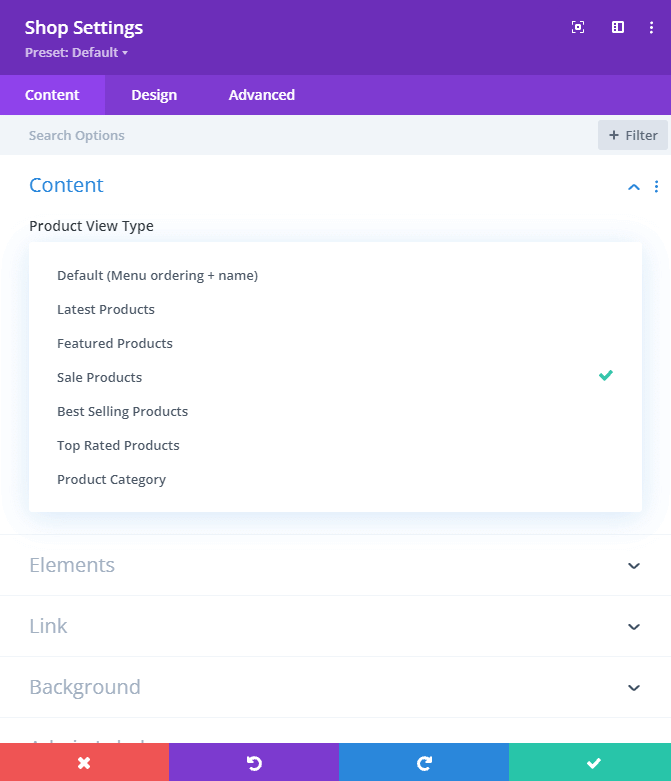
Try to think carefully about these options. For example, you might be able to boost purchase rates by showing your on-sale products on an individual page. You may also want to add star ratings, special pricing rates, and reviews.
Before you save your work, we recommend that you check out other device views from the bottom left menu. That way, you’ll be making sure that mobile users are also getting a smooth shopping experience.
Step 5: Choose your plugins
At this point, your website’s design and pages are mostly set. The last part of making a WordPress website is to add functionality with plugins. Plugins are individual pieces of software that help your site operate in specific ways.
Chances are you’ll need quite a few of these. However, you might not know which ones you need until you’ve been running the site for a little bit – and that’s fine! However, it might be helpful to start with one from each of these categories:
- Security plugins to safeguard your site
- Search Engine Optimization (SEO) programs to help make your site easier to find
- Analytics plugins to help you understand your site’s traffic
- Social sharing tools to extend your website’s reach
While you’re browsing, remember to check the plugins’ reviews and ratings. We also recommend against pirating any plugins. These files are often just ways to infect your website with malicious code.
Finally, don’t be afraid to explore your options. If one program doesn’t work for you, there are probably plenty of other top WordPress plugins that you can use instead.
Conclusion
Building a WordPress website can be a daunting challenge. Fortunately, you don’t have to start from scratch. With the help of tools like the Divi builder, you can take a basic site structure and transform it to perfectly fit your needs.
In this article, we showed you how to make a WordPress website in five steps:
- Install and activate the Divi builder.
- Select a theme.
- Create the essential home and about pages.
- Add unique pages your site may need, such as a blog or a shop.
- Choose the right plugins to give your site more functionality.
If you’re looking to design a beautiful website without any hassle, consider reaching out to our expert team for a custom quote today. We’ll help you build the site of your dreams!

