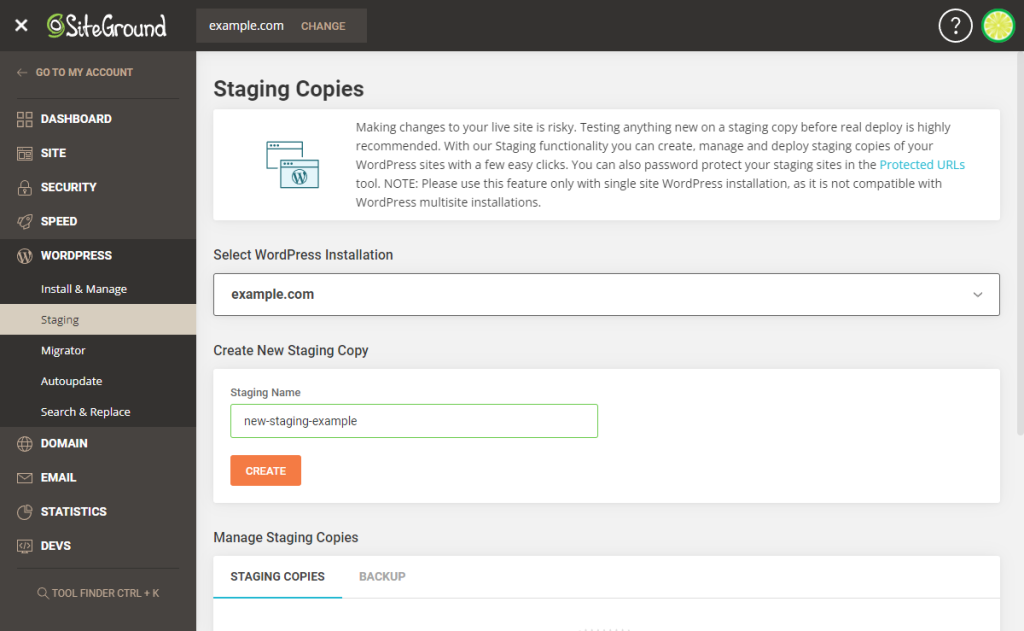
A staging site is a clone of your website where you can test upgrades without damaging your live site. Each time you install a plugin, or a new theme to your WordPress website, you are introducing potential risks that could damage or cause a crash.
When your website is down, it is not generating any revenue, so it is important to be cautious and test every new element before implementing it in a live, production environment on your website. Using a staging site ensures that all the exciting, new changes you make to your site have been tested first before causing potential mishaps for your end users.
Why would you need a WordPress staging site?
Staging is an important part of WordPress website maintenance and upkeep process.
A WordPress staging site is a clone or a duplicate copy of your production site. It gives you a safe, secure environment to test out enhancements to your website to catch any potential difficulties before going live.
Another use for a WordPress staging site is to prepare your website for migration to another server or web hosting service. Moving your entire website is a task you might want to trust to a professional WordPress migration team.
In this article, you will learn several options for creating a WordPress staging site, and how to migrate the changes made in the staging site to the live production site safely and without incident.
Table of Contents:
- Why would you need a WordPress staging site?
- What are the benefits of using a staging site?
- What are the risks of using a staging site?
- How to set up a WordPress staging site through your web hosting service
- How to create a staging site using a plugin
- How to migrate a WordPress site from staging to live
What are the benefits of using a staging site?
The benefits of setting up a staging site is that you are creating a safe environment where you can test changes to your website without running the risk of breaking something on your live site.
A staging site allows you to catch potential conflicts between themes, plugins or any other potential glitches in a setting where you can safely identify and correct them without downtime on your live website which could be disruptive to visitors.
What are the risks of using a staging site?
The risks involved with setting up a staging site includes the costs in the time it takes to set up the staging site and test website modifications. There is also the learning curve required if you manage your own site and you have never used a staging process before. If your website host charges additional fees to set up a staging environment, then those costs are a factor.
But when you weigh each of these risks against the risk of crashing your site when you install a shiny, new enhancement, using a staging site is well worth it. The risk of trying to figure out how to create and use a staging site can be easily avoided when you work with the professional WordPress website support team at FreshySites.

How to set up a WordPress staging site through your web hosting service
Before you make any changes that will impact your website, make a backup copy of your site first. Making a backup will give you the peace of mind you need to plunge into what might feel like risky territory the first time you try using a staging site.
The simplest option for setting up a staging site is to use the one your web hosting service provides. The following five WordPress web hosts offer staging environments as part of their hosting packages:
DreamHost
In their Managed WordPress performance package, DreamHost offers free, automated WordPress migrations and 1-click staging along with other features.
SiteGround
In the GrowBig and GoGeek managed WordPress packages, SiteGround offers unlimited databases, on-demand backup copies of your website and staging as part of the monthly hosting fee.
BlueHost
All three of BlueHost’s managed WordPress hosting package tiers offer a staging environment.
WP Engine
WP Engine’s managed WordPress hosting plans include 1-click staging and backup.
Kinsta
Kinsta’s web hosting service offers various numbers of free premium migrations from one to five per month depending on the tier of service. All hosting tiers get a staging area and a backup retention from 14-30days.
You can create a WordPress staging site using the features your host provides with just a few clicks. Let’s look at Kinsta’s option for creating a staging site:
- In MyKinsta, click on “sites” in the left navigation pane.
- Select which site you want to create a staging site for.
- Click on the “environment” selection next to the site name and choose staging from the drop-down menu.
On the following screen you will have the option to click the “create a staging environment” button to begin creating your staging site.
You will have to wait a while until the staging site has been created and for the DNS to propagate, but once it is finished, you will have a whole, new site environment with its own control panel, plugins, and tools.
If your live site has SSL enabled, your staging site will also have SSL.

How to create a staging site using a plugin
There’s a plugin for everything concerning WordPress, so when it comes to creating a staging site you have several options:
WP Staging- Backup Duplicator & Migration
This is a WordPress plugin that helps you create a secure staging environment in which to test site upgrades and enhancements. WP Staging creates a clone of your website in a subfolder or subdomain.
The basic version of this plugin is free, but the premium version offers features such as pushing the site to production or migrating plugins and themes, and performing scheduled backups to run in the background.
BlogVault Staging
BlogVault Staging offers a free off-site staging setup with one click. It creates a cloned replica of your live WordPress site along with the files and the database, which allows you to test your updates safely. It can be used with any web host, you can create password-protected copies of your staging site, and then merge it into production with two clicks.
All three tiers of the plugin offer one-click staging for an annual subscription plan.
Duplicator
The Duplicator plugin clones, creates a backup and migrates websites between hosts and domains. With Duplicator you can preconfigure your production site in the way it will appear in the staging site. It supports large websites, and you can schedule backups easily.
There are two options: Duplicator Lite and Duplicator Pro which are available for an annual subscription or lifetime plan.
Using the WP Staging plugin as an example of how to create a staging site using a plugin, once you have downloaded and activated the plugin in your WordPress dashboard, open the plugin from the menu and click on the “start cloning” button. Next, click on “create new staging site.” Give the staging site a descriptive name for the staging site so that you can locate it once you have several staging sites.
Click on “start cloning” to make a copy of the entire site. Once that process is complete, you can login with your username and password for your website. When you log in you will see an exact duplicate of your production site. An orange menu bar will appear at the top of your staged site to differentiate it visually from your production site.
Now, you can make all the changes to your site in a safe environment that is exactly like your live site but without running the risk of breaking anything. You can test new ideas in a staging site and launch them with confidence knowing that all the bugs have been worked out before you went live.
How to migrate a WordPress site from staging to live production
The same process that you used to clone a replica of your production site, whether it was a “one-click” feature provided by your web host, or a plugin, you can use to import the clean, upgraded and tested version of your website to production.
When you created your staging site, you created a cloned copy of your production site, exported it to a subdomain, made changes to it, and now the final step is to migrate those changes to the production environment where they will be live online for your customers to see.
To migrate your site after you have made changes in staging, you will import the file that you exported to create the staging site and upload it to your live site using the features your website host provides, or the same plugin you used to set up staging. This new version you have uploaded will overwrite whatever is existing in the current production version of your site. Now your changes are visible online.
Summary
Setting up a staging site and testing your changes before making them live ensures that you do not damage your live site or disrupt your customers’ experience. You can use the easy, intuitive, “one-click” services from your web hosting provider, or a plugin to accomplish this task. If you are an advanced WordPress user, you might attempt this process yourself, but if you are not as comfortable with web technology as you would like to be, there is support available.
If you want to relieve yourself of the task of managing the staging and migration of your website, the team of WordPress developers at FreshySites is ready to handle it for you. We offer top-tier website support services with industry leading response times and friendly, responsive technicians who will resolve your technical challenges so that you can focus on your clients and customers.

